![]()
Beautiful Plants For Your Interior
![]()
Beautiful Plants For Your Interior

I've compiled ten stylish Easter egg decor ideas perfect for adults, elevating your festive aesthetic. Consider elegant marbleized eggs, using food coloring swirls for a luxurious look, or add gold leaf accents for a touch of glamour. Vintage lace embellishments offer sophistication, while whimsical watercolor creations invite creativity. For a modern twist, try minimalist black and white designs or bold geometric patterns. Ombre color gradation provides depth, and eco-friendly upcycled materials foster sustainability. Finally, botanical prints add an organic charm to your decor. These ideas will certainly enhance your Easter celebration, and there's much more to explore.

Creating elegant marbleized eggs is a delightful way to infuse artistry into your Easter decor. I've found this technique to be not only visually stunning but also quite enjoyable. Additionally, using different egg dyeing techniques can open up even more creative possibilities for your designs.
To start, gather your supplies: you'll need hard-boiled eggs, food coloring, a shallow dish, and some water.
Begin by filling the dish with water and adding several drops of different food coloring. Swirl the colors together with a toothpick or skewer to create a marbled effect.
Next, carefully dip the egg into the mixture, allowing it to soak for a few seconds. When you pull it out, you'll see the beautiful patterns form on the surface.
Make sure to dry your marbleized eggs on a paper towel, and consider using a clear sealant to preserve the design.
If you want to take it a step further, you can add metallic gold or silver accents with a fine brush for a touch of luxury. Incorporating unique egg decor ideas can further enhance your festive display.
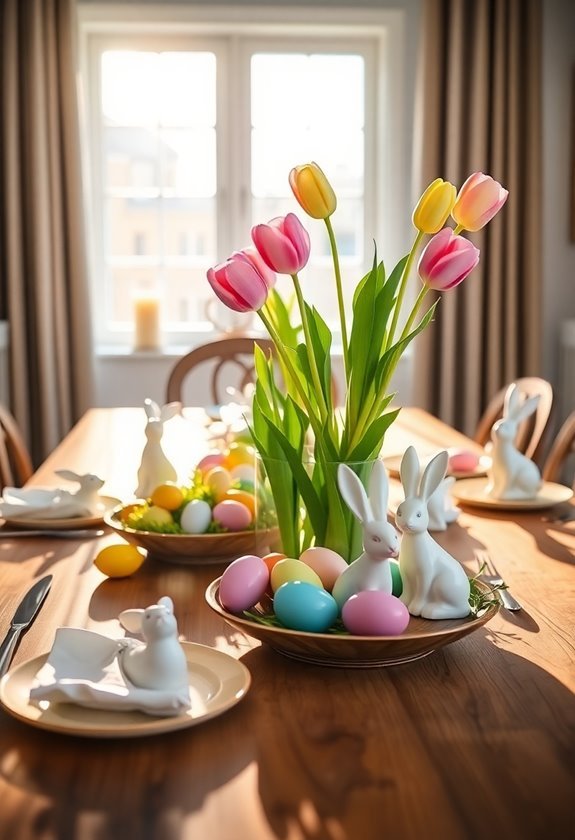
Display your creations in a decorative bowl or as part of a centerpiece, and watch as your guests admire the artistry.
This technique not only elevates your Easter egg decor, but it also provides a wonderful opportunity to release your creativity.
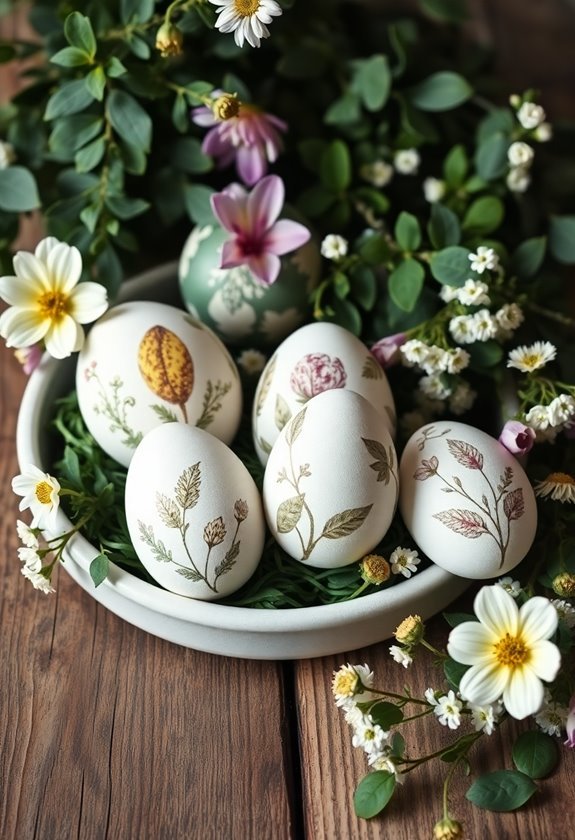
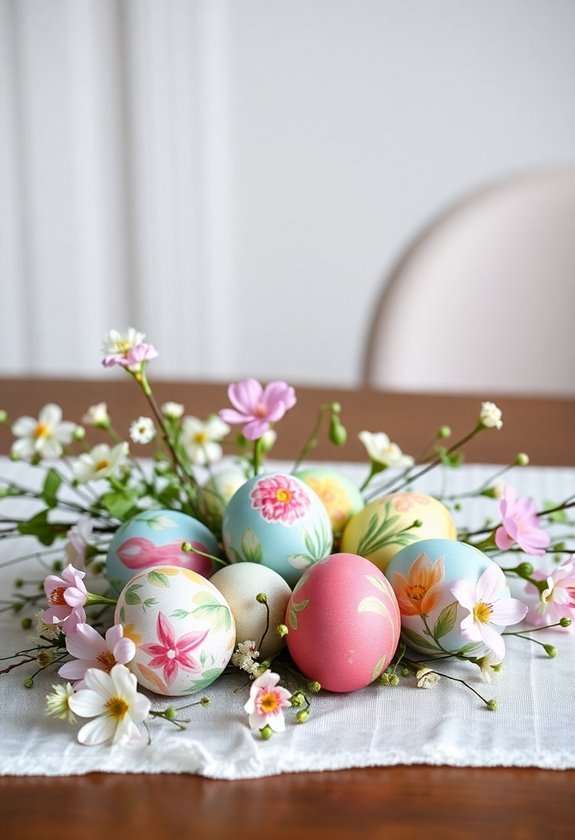
Incorporating botanical print designs into your Easter egg decor adds a fresh, natural touch that's both elegant and eye-catching. I love using these designs to create a serene atmosphere for my holiday celebrations.
To start, you can use real flowers or leaves for a more organic look. Simply press them onto your eggs using a bit of mod podge or a similar adhesive. This method not only preserves the beauty of the plants but also gives your eggs a stunning, textured finish. Utilizing natural materials in decor can enhance your overall design theme.
If you're short on time or prefer something simpler, consider using botanical-themed washi tape or stickers. These come in various designs, from delicate florals to bold tropical leaves, allowing you to customize your eggs effortlessly. Just wrap the tape around the egg or apply the stickers, and you'll instantly elevate your decor.
Another option is to use a stencil to paint botanical patterns. Choose your favorite designs, secure the stencil to the egg, and carefully apply paint. This technique offers a sophisticated look while allowing for creativity.
With these ideas, you can bring the beauty of nature indoors, transforming your Easter celebration into a stylish showcase of botanical art. Additionally, using natural elements in home decor can enhance the overall aesthetic of your space.

Add a touch of luxury to your Easter egg decor with gold leaf accents. Using gold leaf is a fantastic way to elevate your egg designs and create a stunning focal point.
To get started, you'll need gold leaf sheets, adhesive, and a gentle brush. First, prepare your eggs by making sure they're clean and dry. I recommend using either hard-boiled or wooden eggs for durability, as these options provide the best surface for applying decorative elements.
Next, apply a thin layer of adhesive where you want the gold leaf to stick. Be patient, as this adhesive usually needs a few minutes to become tacky. Once it's ready, carefully lay a piece of gold leaf over the adhesive area. Using your brush, gently press the gold leaf down to guarantee it adheres properly. If there are any edges that lift, don't worry; just trim them with your brush or fingers.
For a more sophisticated look, consider layering different gold leaf patterns or combining it with other materials like lace or fabric. Gold leaf accents not only add glamour but also bring a sense of elegance to your Easter celebrations. You can also draw inspiration from Christmas tree decor ideas to create a cohesive holiday theme.
Enjoy the process and watch your eggs transform into luxurious pieces of art!
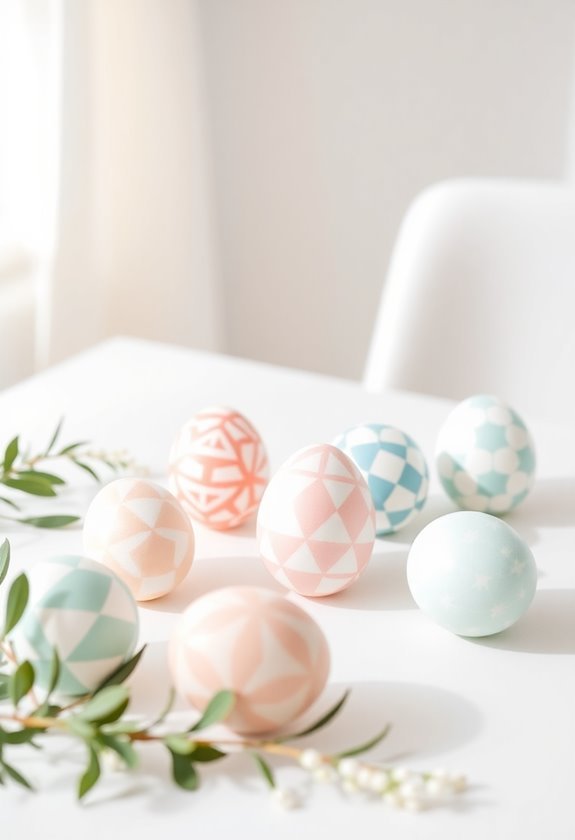
Modern geometric patterns bring a fresh and contemporary twist to Easter egg decorating. I love experimenting with these designs, as they add an artistic flair that stands out during the holiday season. These patterns are increasingly popular among Easter decor enthusiasts, making them a great choice for your decorations.
To start, gather your supplies: plain eggs, washi tape, paint, and a fine brush.
Begin by applying the washi tape in various angles and overlaps to create bold shapes, like triangles and diamonds. This method isn't only easy but also allows for endless creativity.
Once the tape is in place, use acrylic paint to fill in the exposed areas. Opt for a monochromatic palette or mix and match bright colors for a more vibrant look.
If you're feeling adventurous, try using a sponge to dab paint on the eggs, creating a textured effect that complements the geometric patterns.
Once everything's dry, carefully remove the tape to reveal sharp, clean lines.
Don't forget to seal your designs with a clear topcoat, enhancing durability and shine. These techniques can also be applied to other surfaces, making them versatile for various Easter egg decor ideas.
These modern geometric patterns not only elevate your Easter decor but also provide a unique conversation starter during gatherings. Give it a try; you might find a new favorite decorating technique!
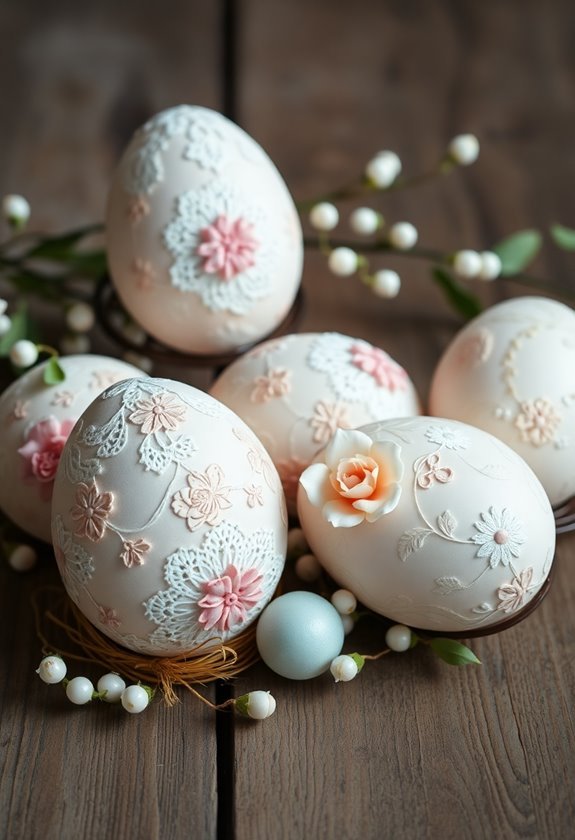
Vintage lace embellishments bring a delicate and timeless charm to Easter egg decorating. I love incorporating lace into my designs because it adds an intricate touch that feels both elegant and nostalgic. To create a cohesive look, consider pairing your vintage lace eggs with complimentary nursery decor that enhances the overall theme of your space.
To begin, gather some lace fabric or lace doilies from a craft store or your grandmother's treasure chest. Once you have your lace, cut it into strips or shapes that fit your eggs. I recommend using hard-boiled eggs or wooden eggs, as they provide a sturdy base.
Next, apply a thin layer of Mod Podge or a similar adhesive to the egg's surface. Carefully lay the lace over the wet adhesive, ensuring it's smooth and evenly placed. After applying the lace, I like to seal it with another layer of Mod Podge. This step not only adheres the lace but also gives it a glossy finish, enhancing its visual appeal.
Allow the eggs to dry completely, and you'll see how the lace creates a stunning contrast against the egg's color.
These vintage lace eggs can be displayed in a bowl or hung as ornaments, adding sophistication to your Easter decor. Incorporating seasonal elements into your decor can elevate the overall aesthetic. Enjoy the process; it's a delightful way to celebrate the season!

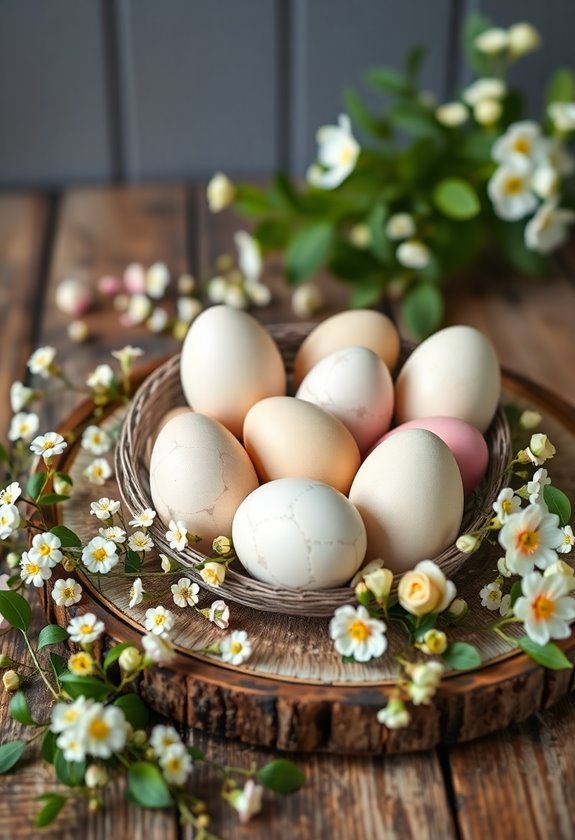
Using natural dyes and textures can transform your Easter egg decorating into a vibrant and eco-friendly experience.
When I first tried using natural materials, I was amazed at how simple ingredients from my kitchen could create beautiful, earthy colors. For instance, boiling red cabbage yields a stunning blue, while turmeric produces a bright yellow. To make the dye, just simmer the plant material in water for about 30 minutes, then strain it. Using natural ingredients not only enhances the aesthetic but also keeps the process environmentally friendly.
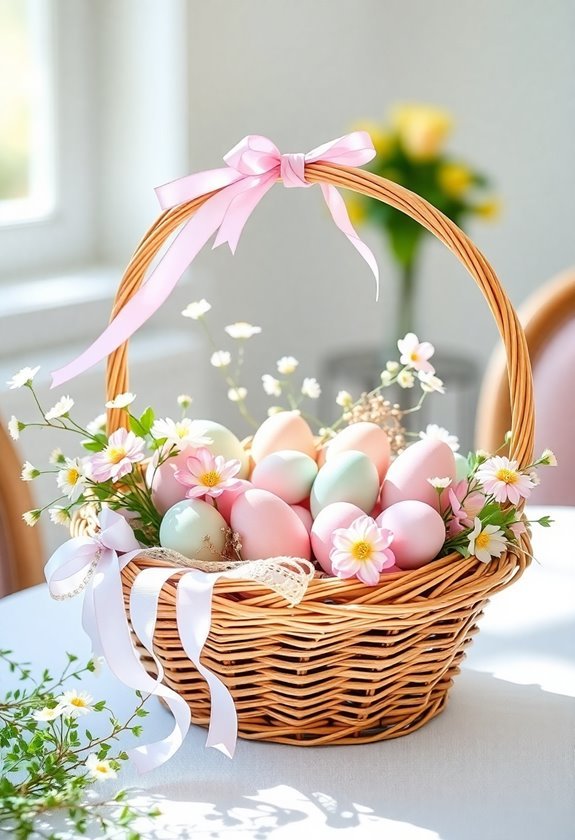
Once you've prepared your dyes, consider experimenting with different textures. You can wrap your eggs in natural items like leaves, flowers, or even fabric before dyeing. This technique, called "resist dyeing," creates intricate patterns that are both unique and visually appealing. Additionally, incorporating Easter basket decor ideas can elevate your overall Easter celebration.
Another option is to use various applications like sponges or brushes to apply the dye, giving you more control over the intensity of the color.

Creating whimsical watercolor creations for Easter eggs is a delightful way to release your inner artist. I love the vibrant colors and soft, flowing designs you can achieve with this technique. To get started, gather your materials: white eggs, watercolor paints, a paintbrush, and a palette for mixing colors. Additionally, consider incorporating your watercolor creations into your simple small bathroom decor for a unique seasonal accent.
First, hard-boil your eggs and let them cool completely. Once cooled, prepare a workspace covered with newspaper or a protective cloth. I prefer using liquid watercolors, as they blend beautifully, but you can also use traditional watercolor sets.
Start by wetting your brush, dipping it into the paint, and applying it to the egg's surface. Don't worry about perfection; the beauty of watercolor is in its unpredictability. I often layer different colors while the previous layer is still wet, allowing them to blend and create unique patterns.
You can also use a straw to blow the paint around for a fun, abstract effect. Once you're happy with your designs, let the eggs dry completely. To finish, consider applying a clear sealant for added protection. Incorporating your artistic creations into your home can enhance your modern bathroom decor and bring a fresh seasonal touch.
Display your whimsical watercolor eggs in a basket or as part of your table centerpiece, and enjoy your artistic creation!
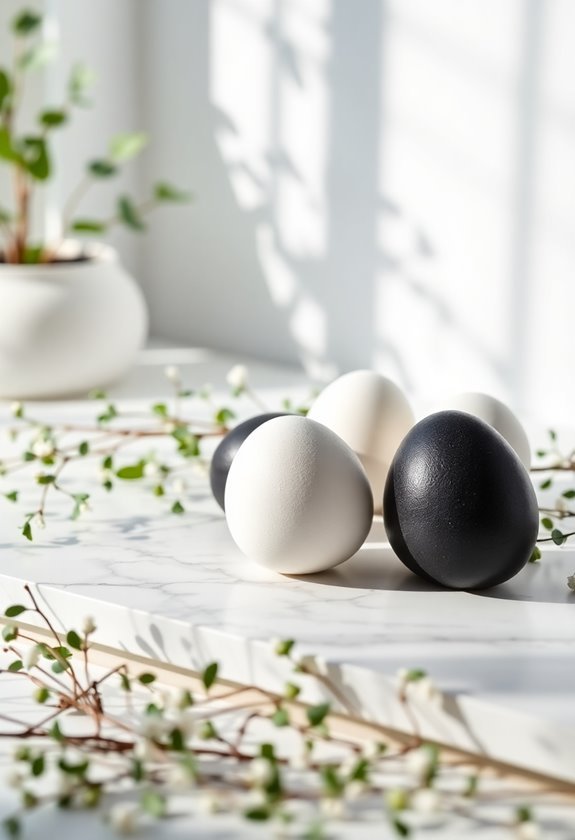
Simplicity often speaks volumes, and that's precisely what minimalist black and white Easter egg decor achieves. This aesthetic strips away the clutter and focuses on clean lines and stark contrasts. I love how a few well-placed black and white eggs can transform a space into a sophisticated display.
To start, consider using plain white eggs as your base. You can leave them unadorned for a classic look, or add subtle designs. For example, using a fine-tipped black marker, I often draw simple geometric patterns or thin stripes. This technique adds just enough detail without overwhelming the overall design.
If you want to elevate your decor further, think about incorporating textured elements. A few eggs can be wrapped in black lace or twine for a tactile contrast against the smoothness of the white eggs. You may also experiment with matte versus glossy finishes to create visual interest.
Arranging these eggs in a minimalist bowl or on a sleek platter can enhance their impact. Remember, the goal is to create a cohesive and stylish display that captivates without overwhelming.
This approach to Easter egg decor is timeless, elegant, and effortlessly chic.
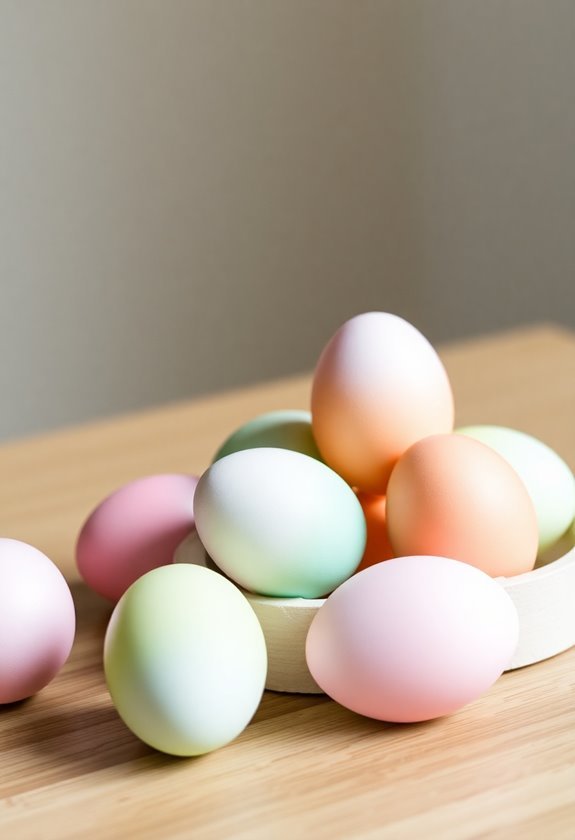
With a striking visual appeal, ombre color gradation brings a vibrant touch to Easter egg decor. This technique involves blending multiple shades of a color, creating a smooth shift from light to dark.
It's a fantastic way to add depth and interest to your eggs, making them stand out in any Easter display.
To achieve this look, start with white eggs or pre-dyed ones in a light base color. You'll need your chosen dye colors, preferably three to five shades in a similar color family.
Begin by mixing your dyes in separate containers, ensuring that the colors shift smoothly from light to dark.
Next, dip the bottom third of the egg into the darkest dye, allowing it to soak for a few minutes. Gradually lift the egg out, and then dip the middle section into a lighter shade.
Repeat this process for the top third, using the lightest shade. Rinse each egg gently between dips to avoid color contamination.
Once dried, these ombre eggs will display a stunning gradient effect that adds sophistication to your Easter decor.
They're perfect for showcasing on a mantel or as part of a centerpiece.

A variety of eco-friendly upcycled materials can transform your Easter egg decorating into a sustainable art project. Instead of purchasing new supplies, consider using items you already have at home. For instance, old newspapers or magazines can be torn into strips and used for decoupage. This not only reduces waste but also adds a unique texture to your eggs.
Another option is to repurpose fabric scraps. Whether it's an old shirt or leftover material from sewing projects, these can be cut into shapes and glued onto your eggs. The result is a charming, tactile finish.
Additionally, you can use natural dyes made from kitchen scraps, like beet juice or onion skins, to color your eggs. This method avoids harmful chemicals and creates beautiful, earthy tones.
Lastly, even cardboard egg cartons can serve a purpose. Cut them into shapes—like flowers or bunnies—and paint or decorate them to create a delightful display for your eggs.
Each of these ideas not only promotes creativity but also fosters an environmentally friendly approach to holiday decorating. By utilizing what you have, you can make your Easter celebration both stylish and sustainable.
When creating marbleized eggs, I love using food coloring, vinegar, and water. The combination of these materials helps achieve stunning swirls and vibrant colors that really stand out. It's a fun process I enjoy every time!
I've found that using ingredients like beet juice or turmeric works great for natural dyes. I boil them with water and vinegar, then soak my eggs overnight for vibrant, safe colors. It's fun and eco-friendly!
I've tried using regular paint for watercolor egg designs, and it works well! Just remember to thin the paint with water for a softer look. It's fun to experiment with colors and techniques!
To seal decorated eggs, I use a clear acrylic spray sealer. It protects my designs while keeping them vibrant. Just make sure to spray in a well-ventilated area for the best results!
After Easter, I carefully store my decorated eggs in a sturdy box with dividers. I wrap each one in tissue paper to prevent breakage, ensuring they stay safe and beautiful for next year's display.